Figure 1
Different types of smile: A) commissure smile; B) social smile; and C)
spontaneous smile.
Figure 2
Frames showing different degrees of incisor exposure. A-D) at speaking and
E-H) at smiling.
Figure 3
Smile illustration: A) ideal design; B) smile esthetic zone - in blue and
C) dominance of central incisors - in yellow.
Figure 4
Case report showing the esthetic impact of changes in vertical
positioning of incisors at smiling: A) initial smile showing inverted smile
arc; B) illustration showing final incisors positioning; C) alignment and
leveling outcomes with changes in bonding protocol following lower lip
contour; and D) final result.
Figure 5
Different types of smile arc: A) convex or curved; B) plane or straight;
and C) inverted or reverse.
Figure 6
Ideal incisal contour design of teeth in the esthetic zone.
Figure 7
Strategies used to extrude maxillary incisors so as to achieve ideal
incisal contour design and increase exposure at rest, smile and while
speaking: A) changes in height of bracket positioning; and B) orthodontic
arch bends.
Figure 8
Different methods employed to measure maxillary central incisors width
and height: A) clinical caliper measurement; B) caliper measurement in
conventional model; and C) software measurement in digital model.
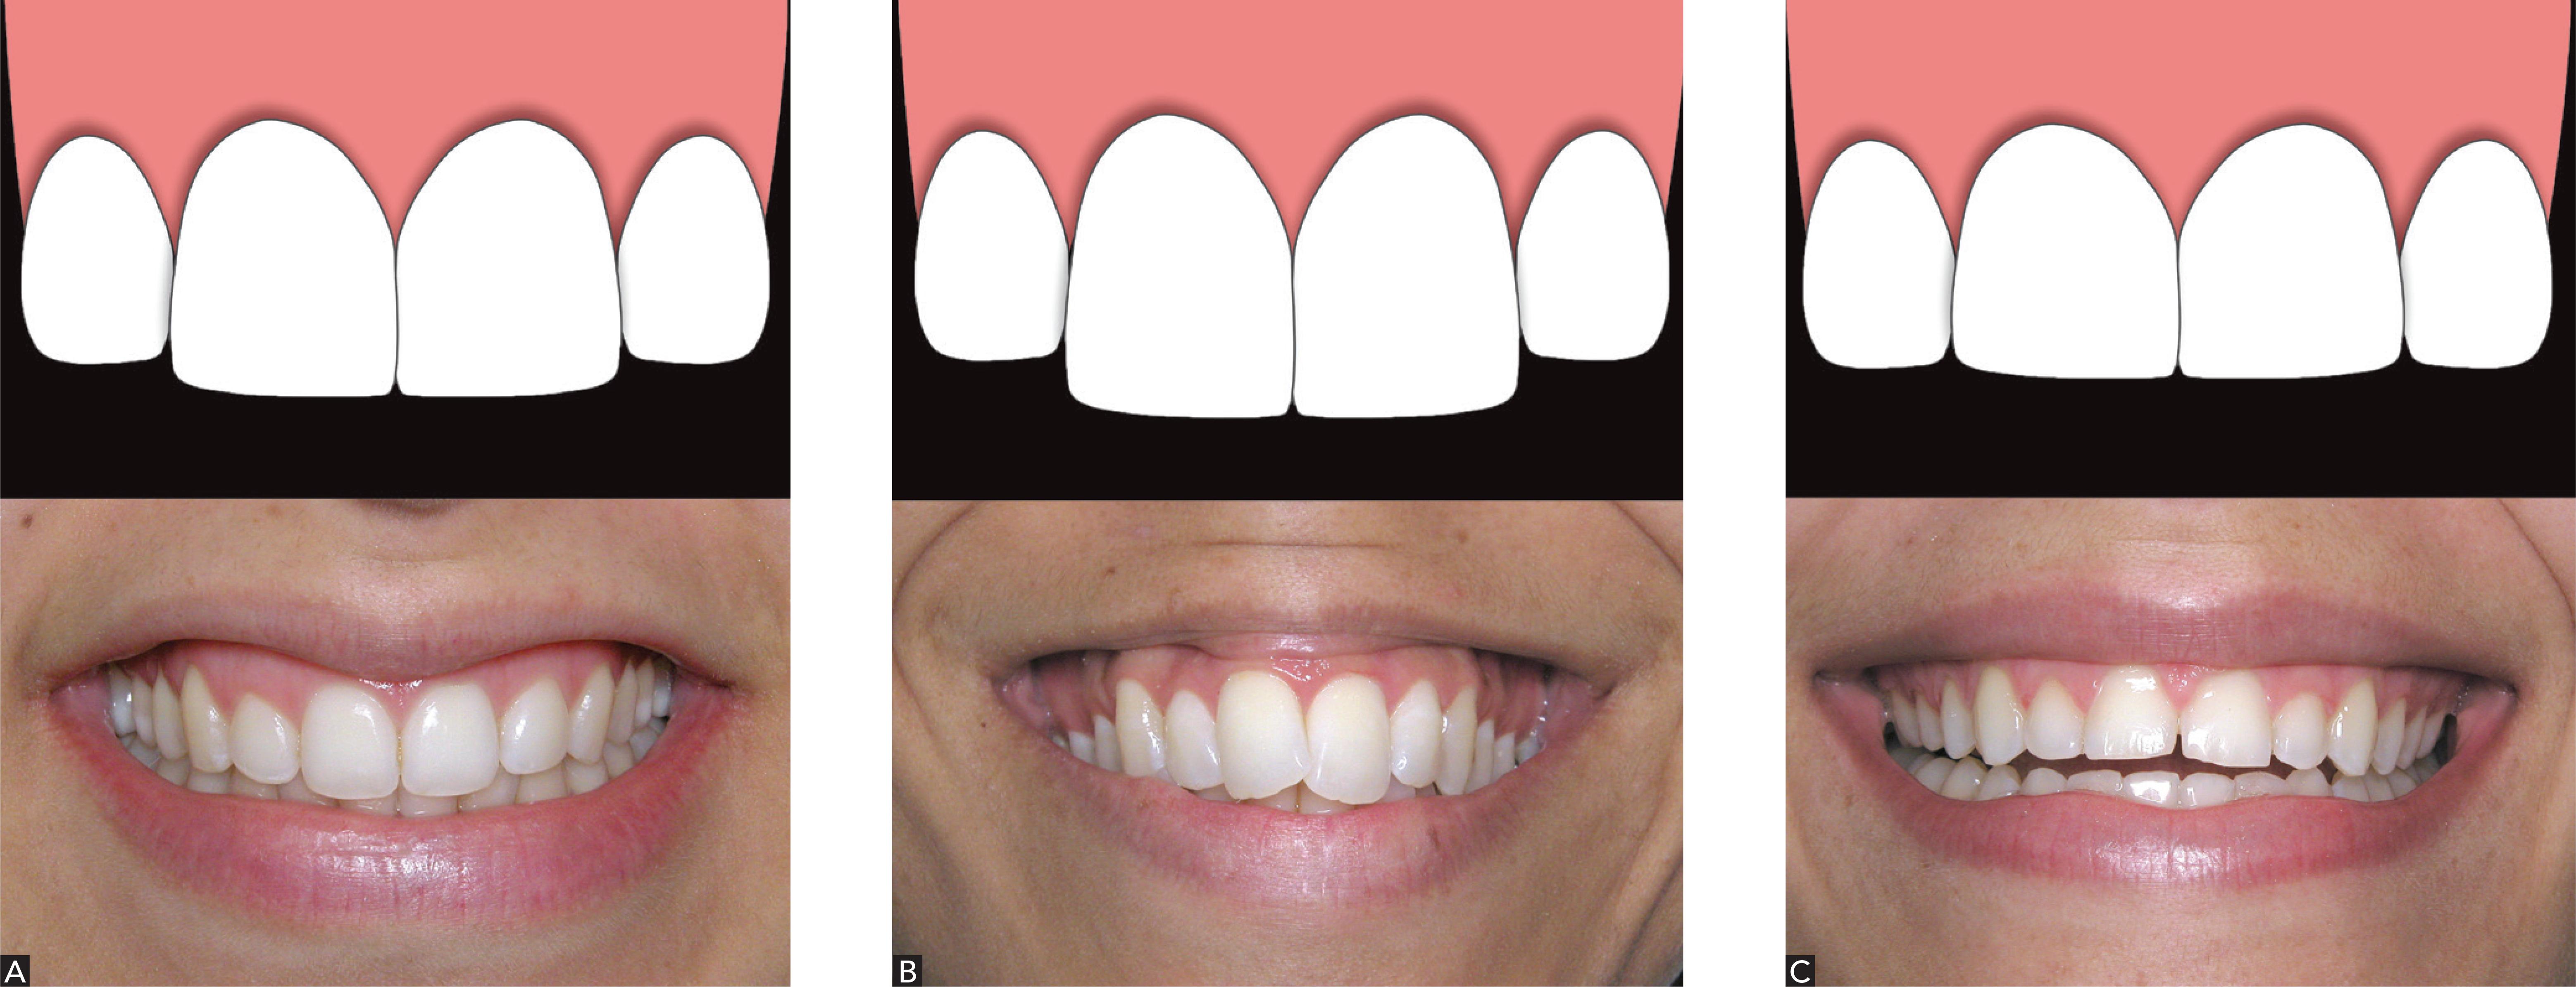
Figure 9
Different width-height ratio of central incisors: A) ideal ratio,
between 75 and 85%; B) long teeth with ratio < 75%; and C) short or
squared teeth with ratio > 85%
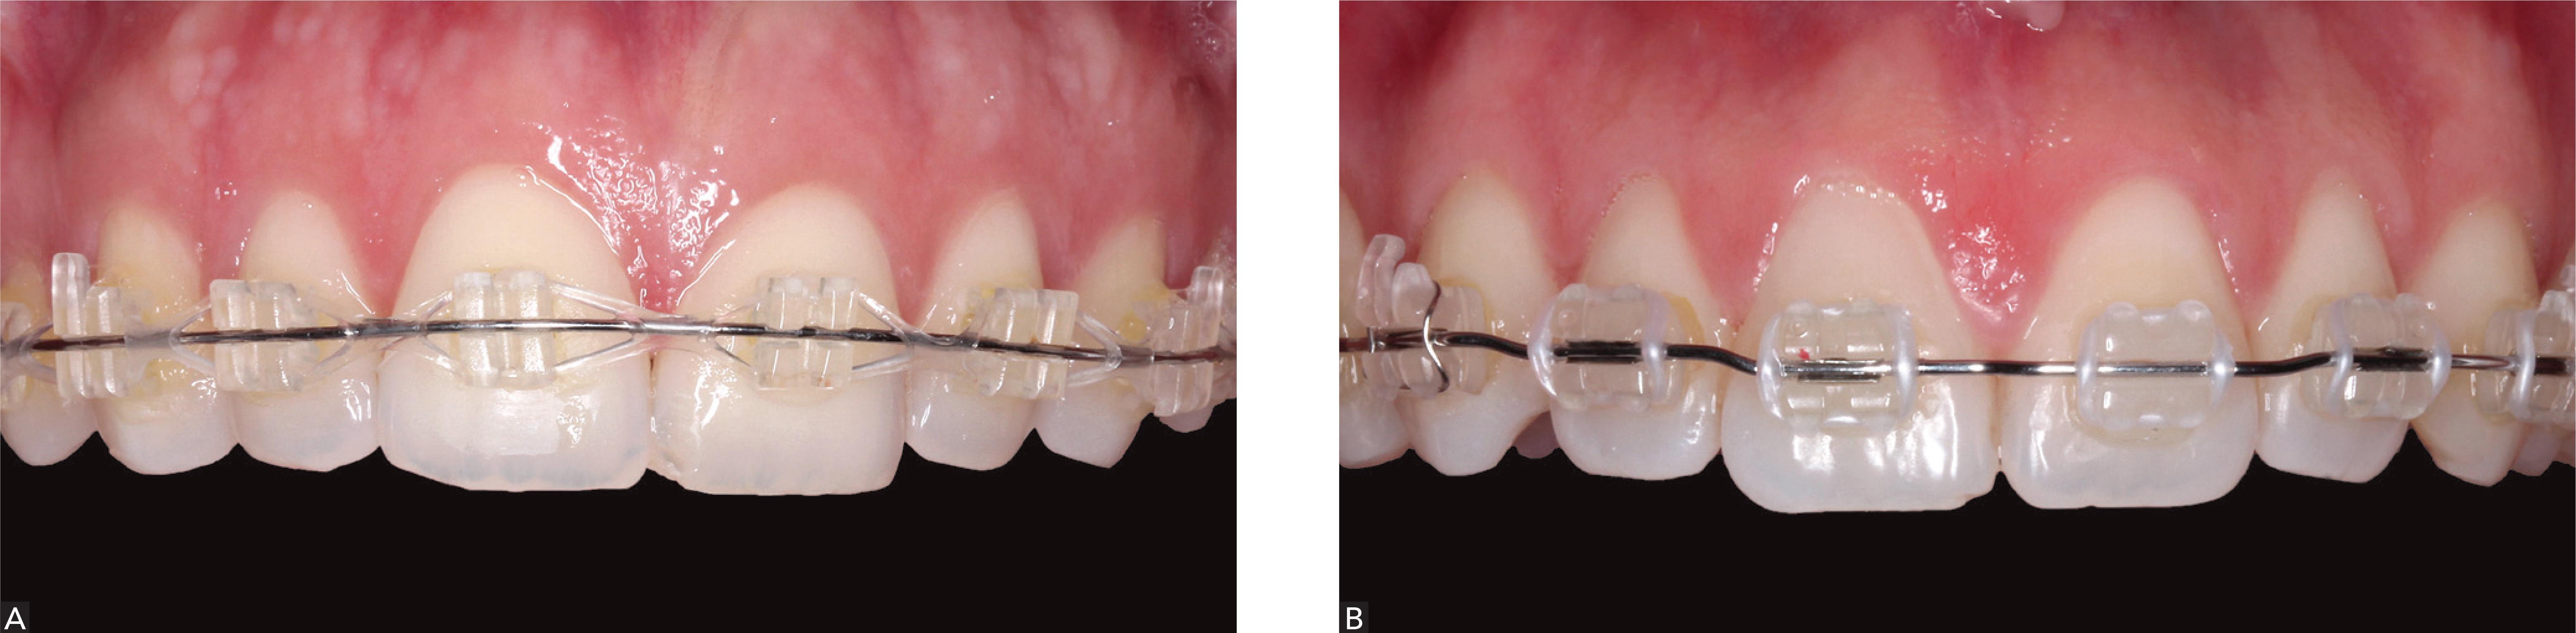
Figure 10
Clinical case illustrating the importance of W/H ratio in smile
esthetics: A) initial closed-up view of maxillary incisors; B) after
orthodontic appliance removal; C) final result; D) final smile.
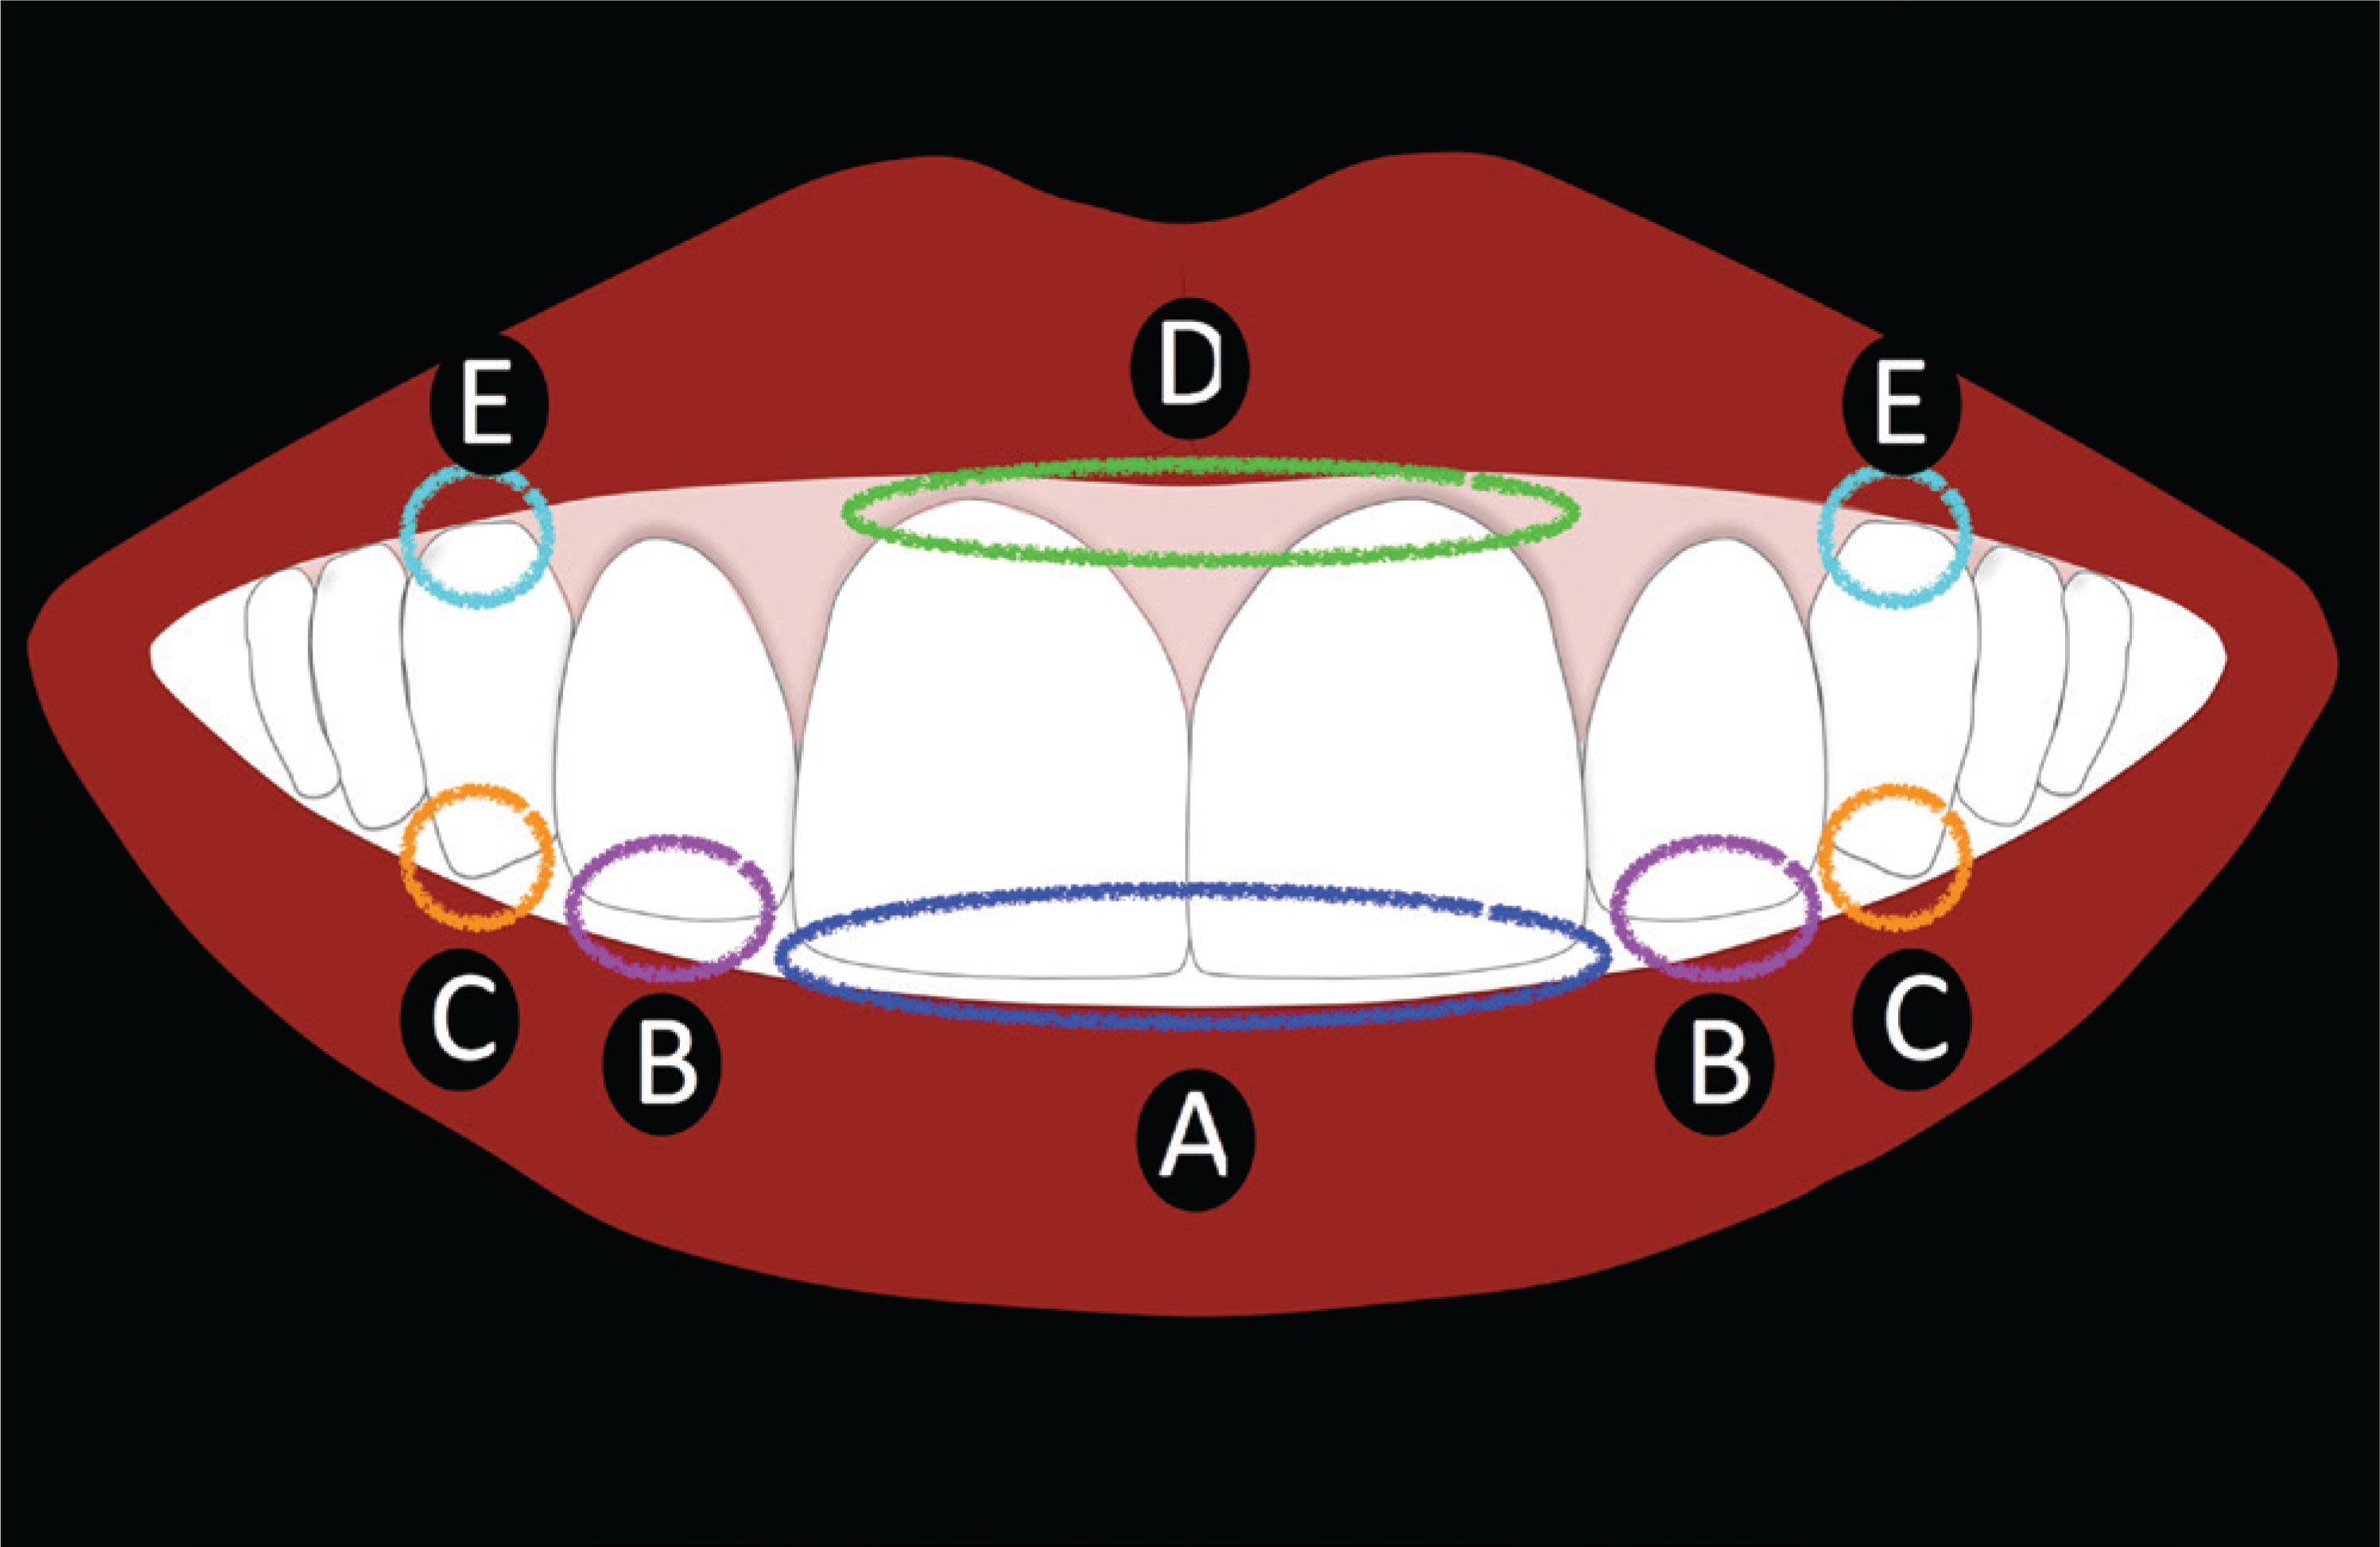
Figure 11
Limits of esthetic acceptability of incisal and gingival asymmetry in
the esthetic zone: A) 0.5 mm1; B) 1.0 mm1; C) 2.0 mm17; D) from 1.5 to 2.0
mm11,14; and E) from 1.5 to 2.0 mm16.
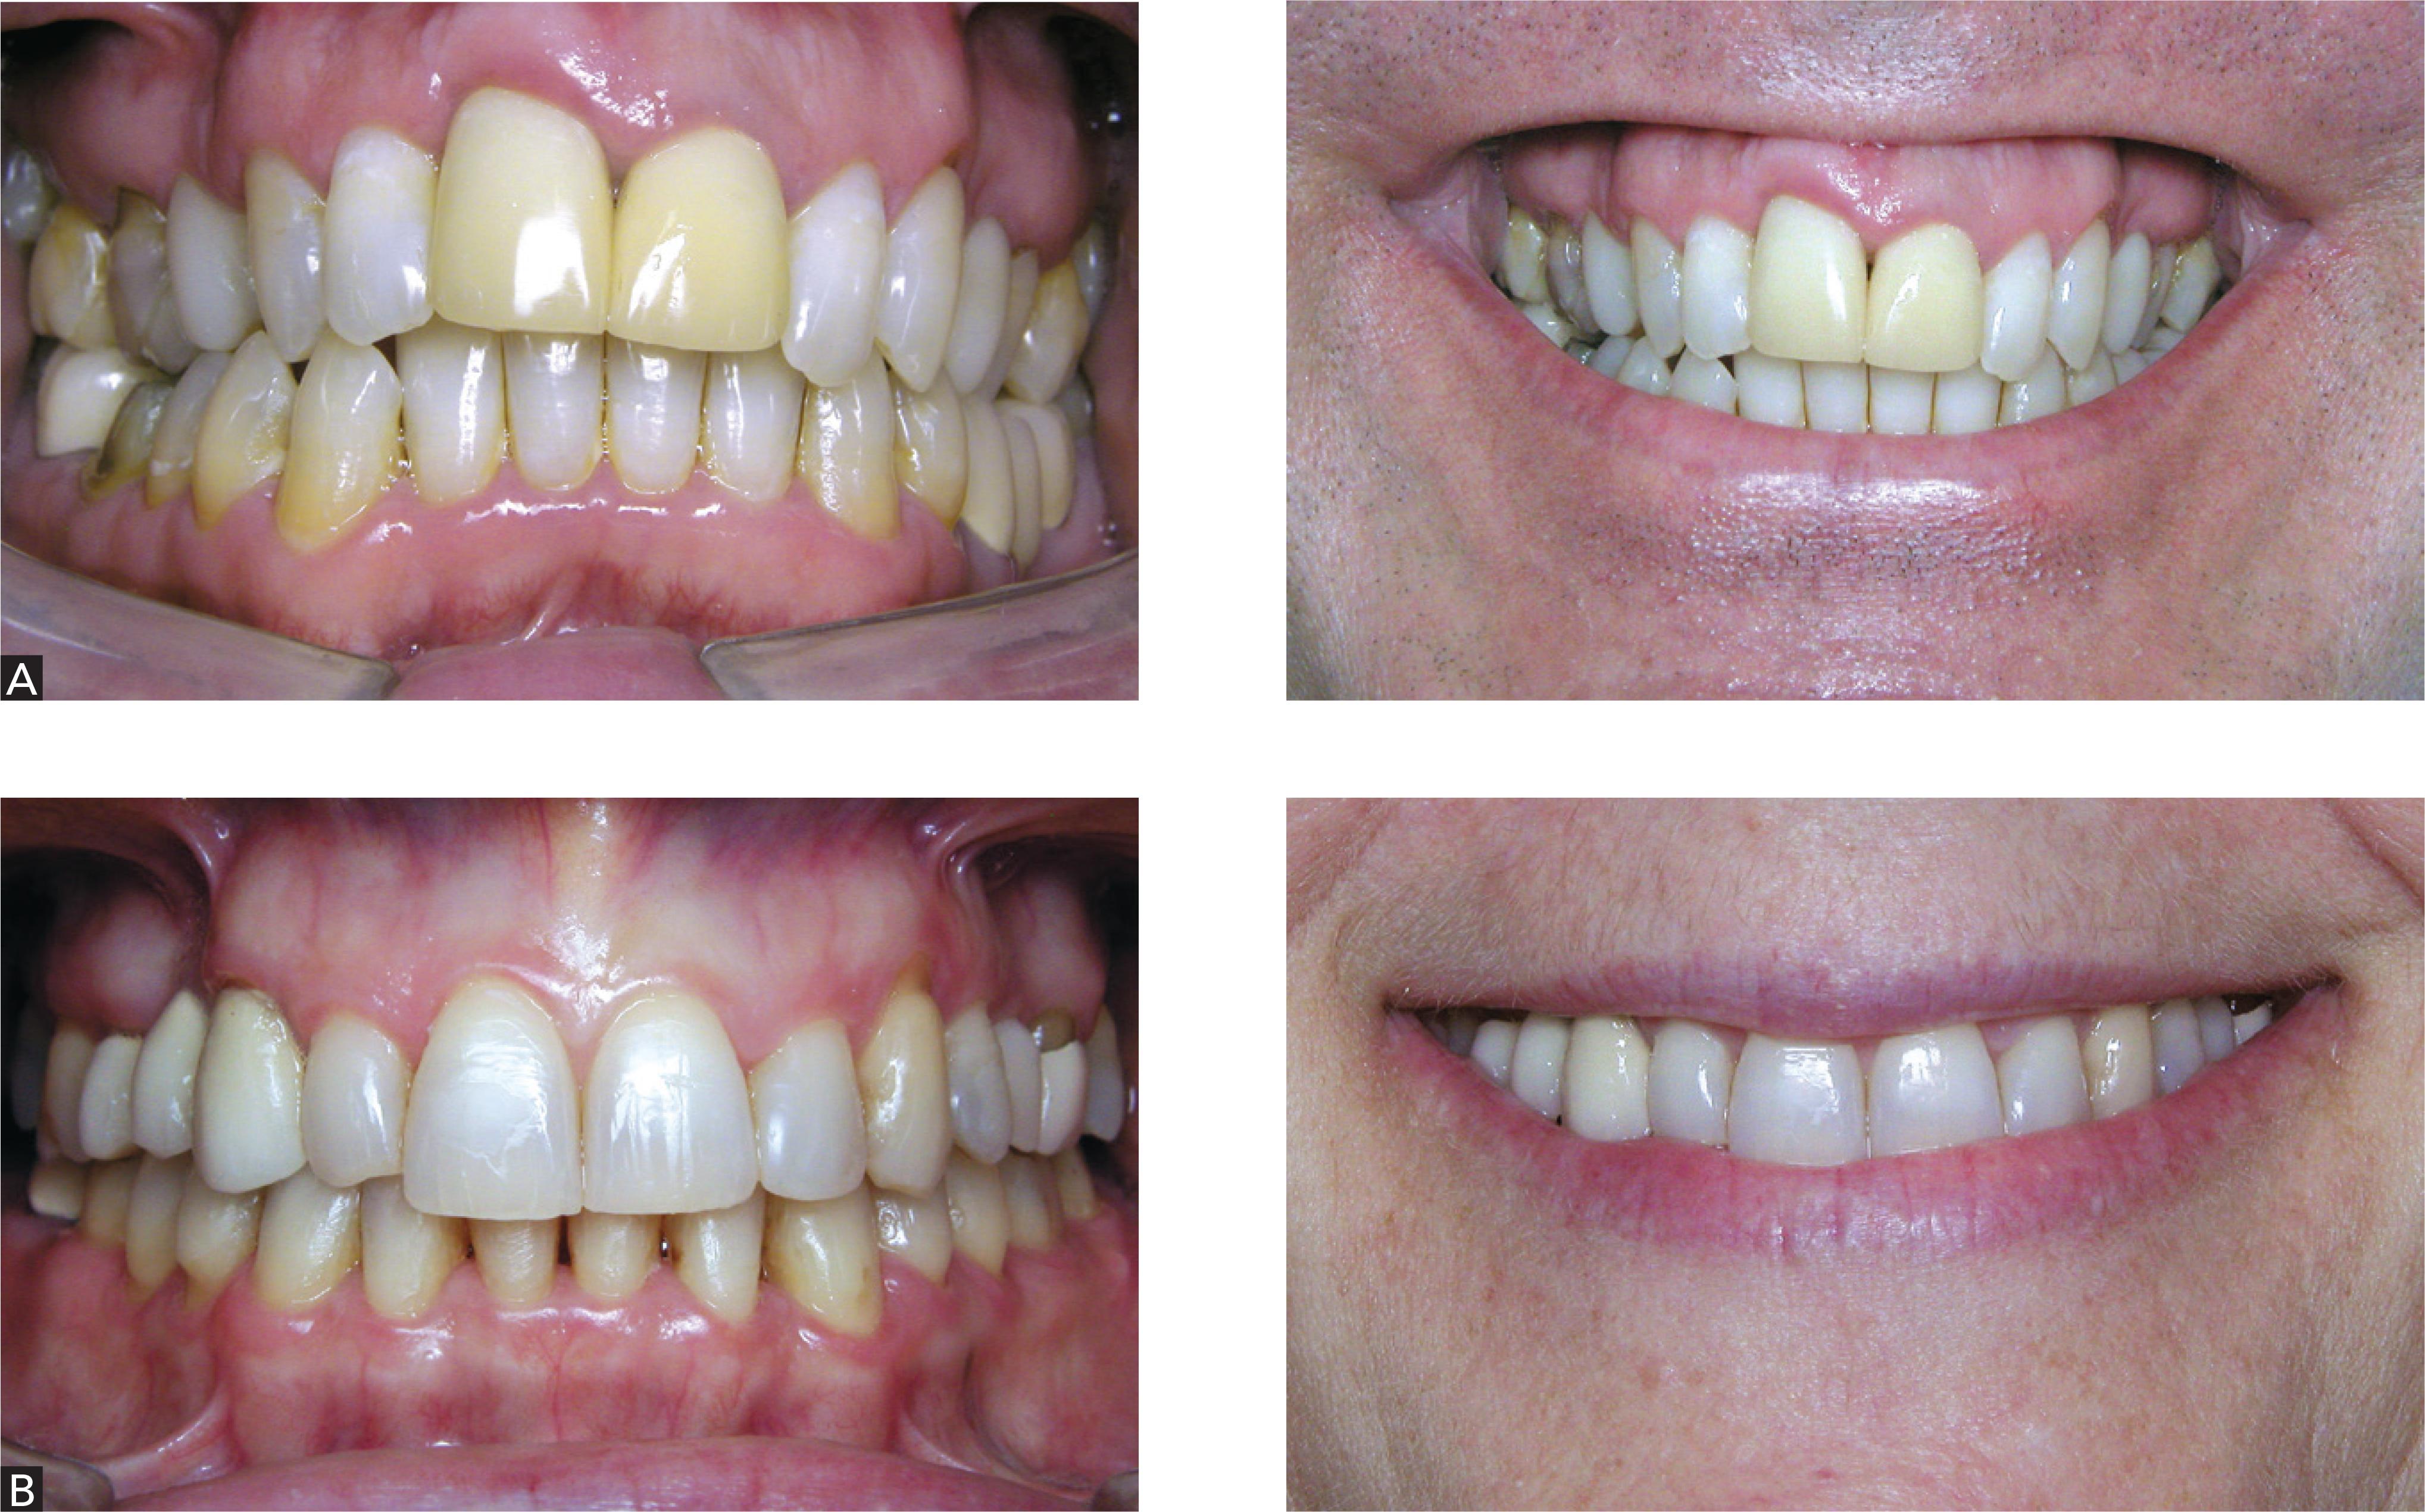
Figure 12
Clinical case illustrating the importance of symmetry between central
incisors in smile esthetics: A) initial; B) during orthodontic treatment; C)
after orthodontic appliance removal; D) final result; and E) final
smile.
Figure 13
Smile with golden ratio (62%) between teeth in the esthetic
zone.
Figure 14
Digital ratio grid used with two narrow smiles: A) golden ratio grid
(62%) and B) grid with modified ratio (70%).
Figure 15
Clinical case illustrating the importance of proportion between
anterosuperior teeth: A) initial closed-up view in the esthetic zone showing
right lateral incisor of reduced width (blue arrow); B) initial smile; C)
final result showing adequate proportion between teeth in the esthetic zone;
D) final smile.
Figure 16
The impact of midline diastema correction over patient's smile: A)
initial smile; B) final smile; C) initial frontal view; D) frontal view
after activator use; E) final frontal view after fixed corrective
orthodontic treatment.
Figure 17
Diastema correction in maxillary lateral incisors area: A) initial
frontal view; B) initial lateral view of maxillary left incisor; C) final
frontal view; and D) final view in maxillary lateral incisors area.
Figure 18
Two different gingival margin designs: A) Classic: leveled canine and
central incisor margins, with lateral incisor margin slightly below; B)
Modified: central incisor margin below canines and lateral incisor margins
leveled with central incisors or slightly below them.
Figure 19
Two clinical cases with gingival asymmetry in the esthetic zone
requiring different treatment procedures: A) real need for intervention due
to great gingival asymmetry exposure at smiling; and B) smile without
gingival asymmetry exposure and with no need for treatment.
Figure 20
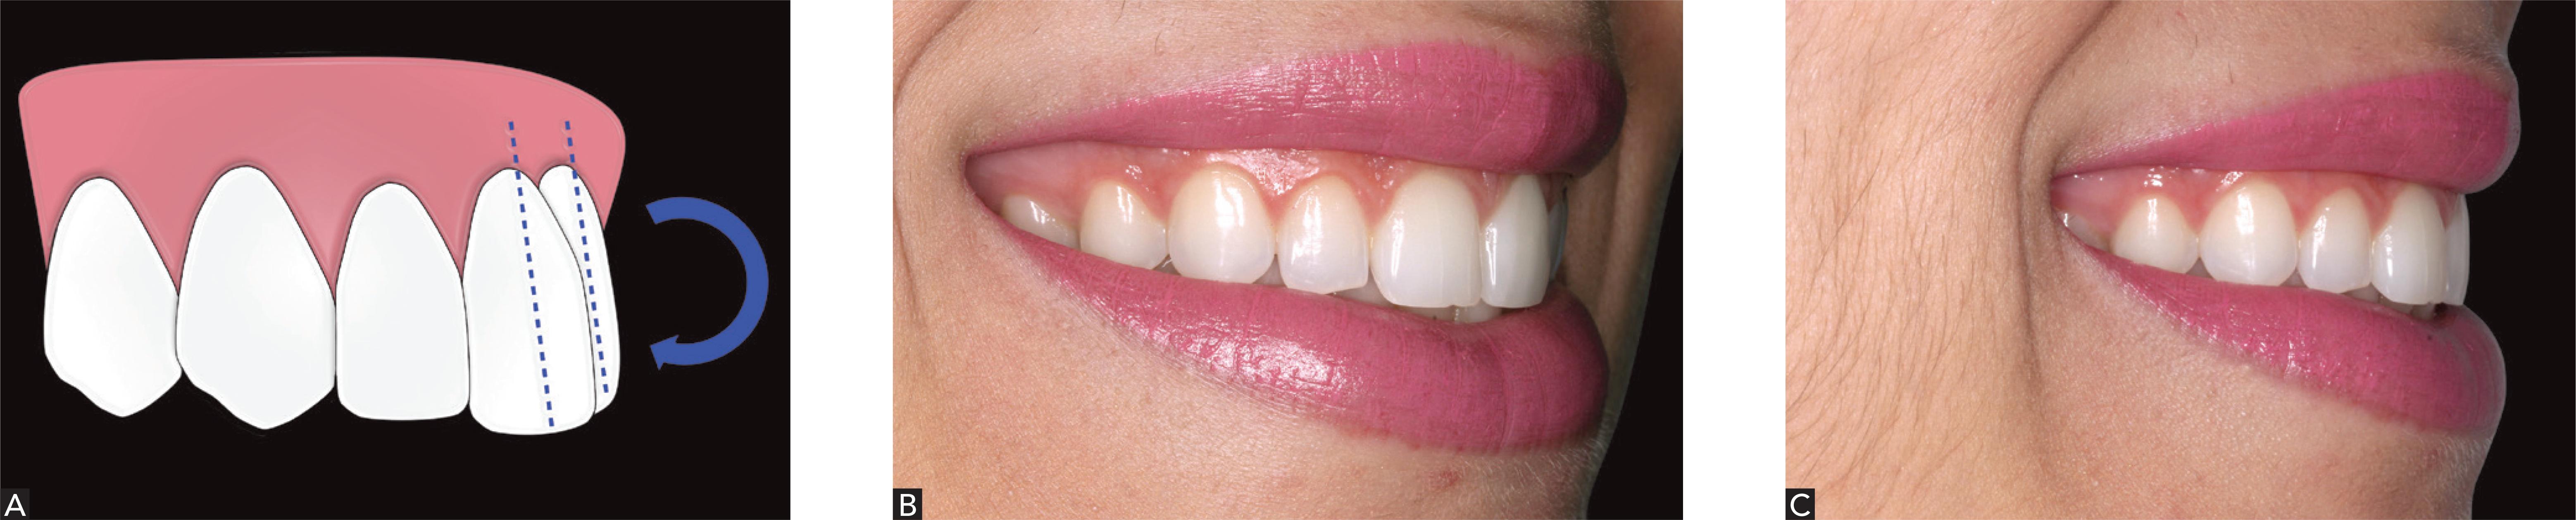
Gingival asymmetry between maxillary central incisors.
Figure 21
Clinical case illustrating incisal and gingival asymmetry correction: A)
initial smile; B) orthodontic treatment result; and C) final smile.
Figure 22
Different smile lines according to Tjan et al.23 A) high smile,
characterized by total exposure of clinical crowns and continuous strip of
gingival tissue; B) medium smile, characterized by great (75%) or total
(100%) exposure of clinical crowns and interdental or interproximal
papillae; C) low smile, characterized by clinical crown exposure not greater
than 75% and no gingival tissue.
Figure 23
Clinical case illustrating gingival smile treatment: A) initial smile;
B) orthodontic treatment outcome, illustrating ideal incisal design; and C)
final smile.
Figure 24
Different types of buccal corridor: A) buccal corridor at smiling; B)
wide buccal corridor; C) intermediate buccal corridor; and D) narrow buccal
corridor.
Figure 25
Importance of assessing incisor angulation in lateral view: A) ideal
torque; B) oblique radiograph; and C) perpendicular radiograph.
Figure 26
Clinical case illustrating the negative impact of changes in incisor
angulation in frontal view: A) initial frontal photograph and smile
photograph; B) intermediate result after incisal plane and angulation
correction with the aid of mini-implant.
Figure 27
Clinical case illustrating the importance of detailing and tooth
anatomical shape: A) orthodontic finishing phase; B) closed-up view of the
esthetic zone showing black triangles caused by inappropriate contact; C)
final results after teeth reshaping.
Figure 28
Diagram illustrating the ideal position of contact between central
incisors so as to favor filling of interproximal spaces by interdental
papillae.
Figure 29
Diagram illustrating the ideal disposition of incisal embrasures,
showing a natural and progressive increase from central incisors to
canines.
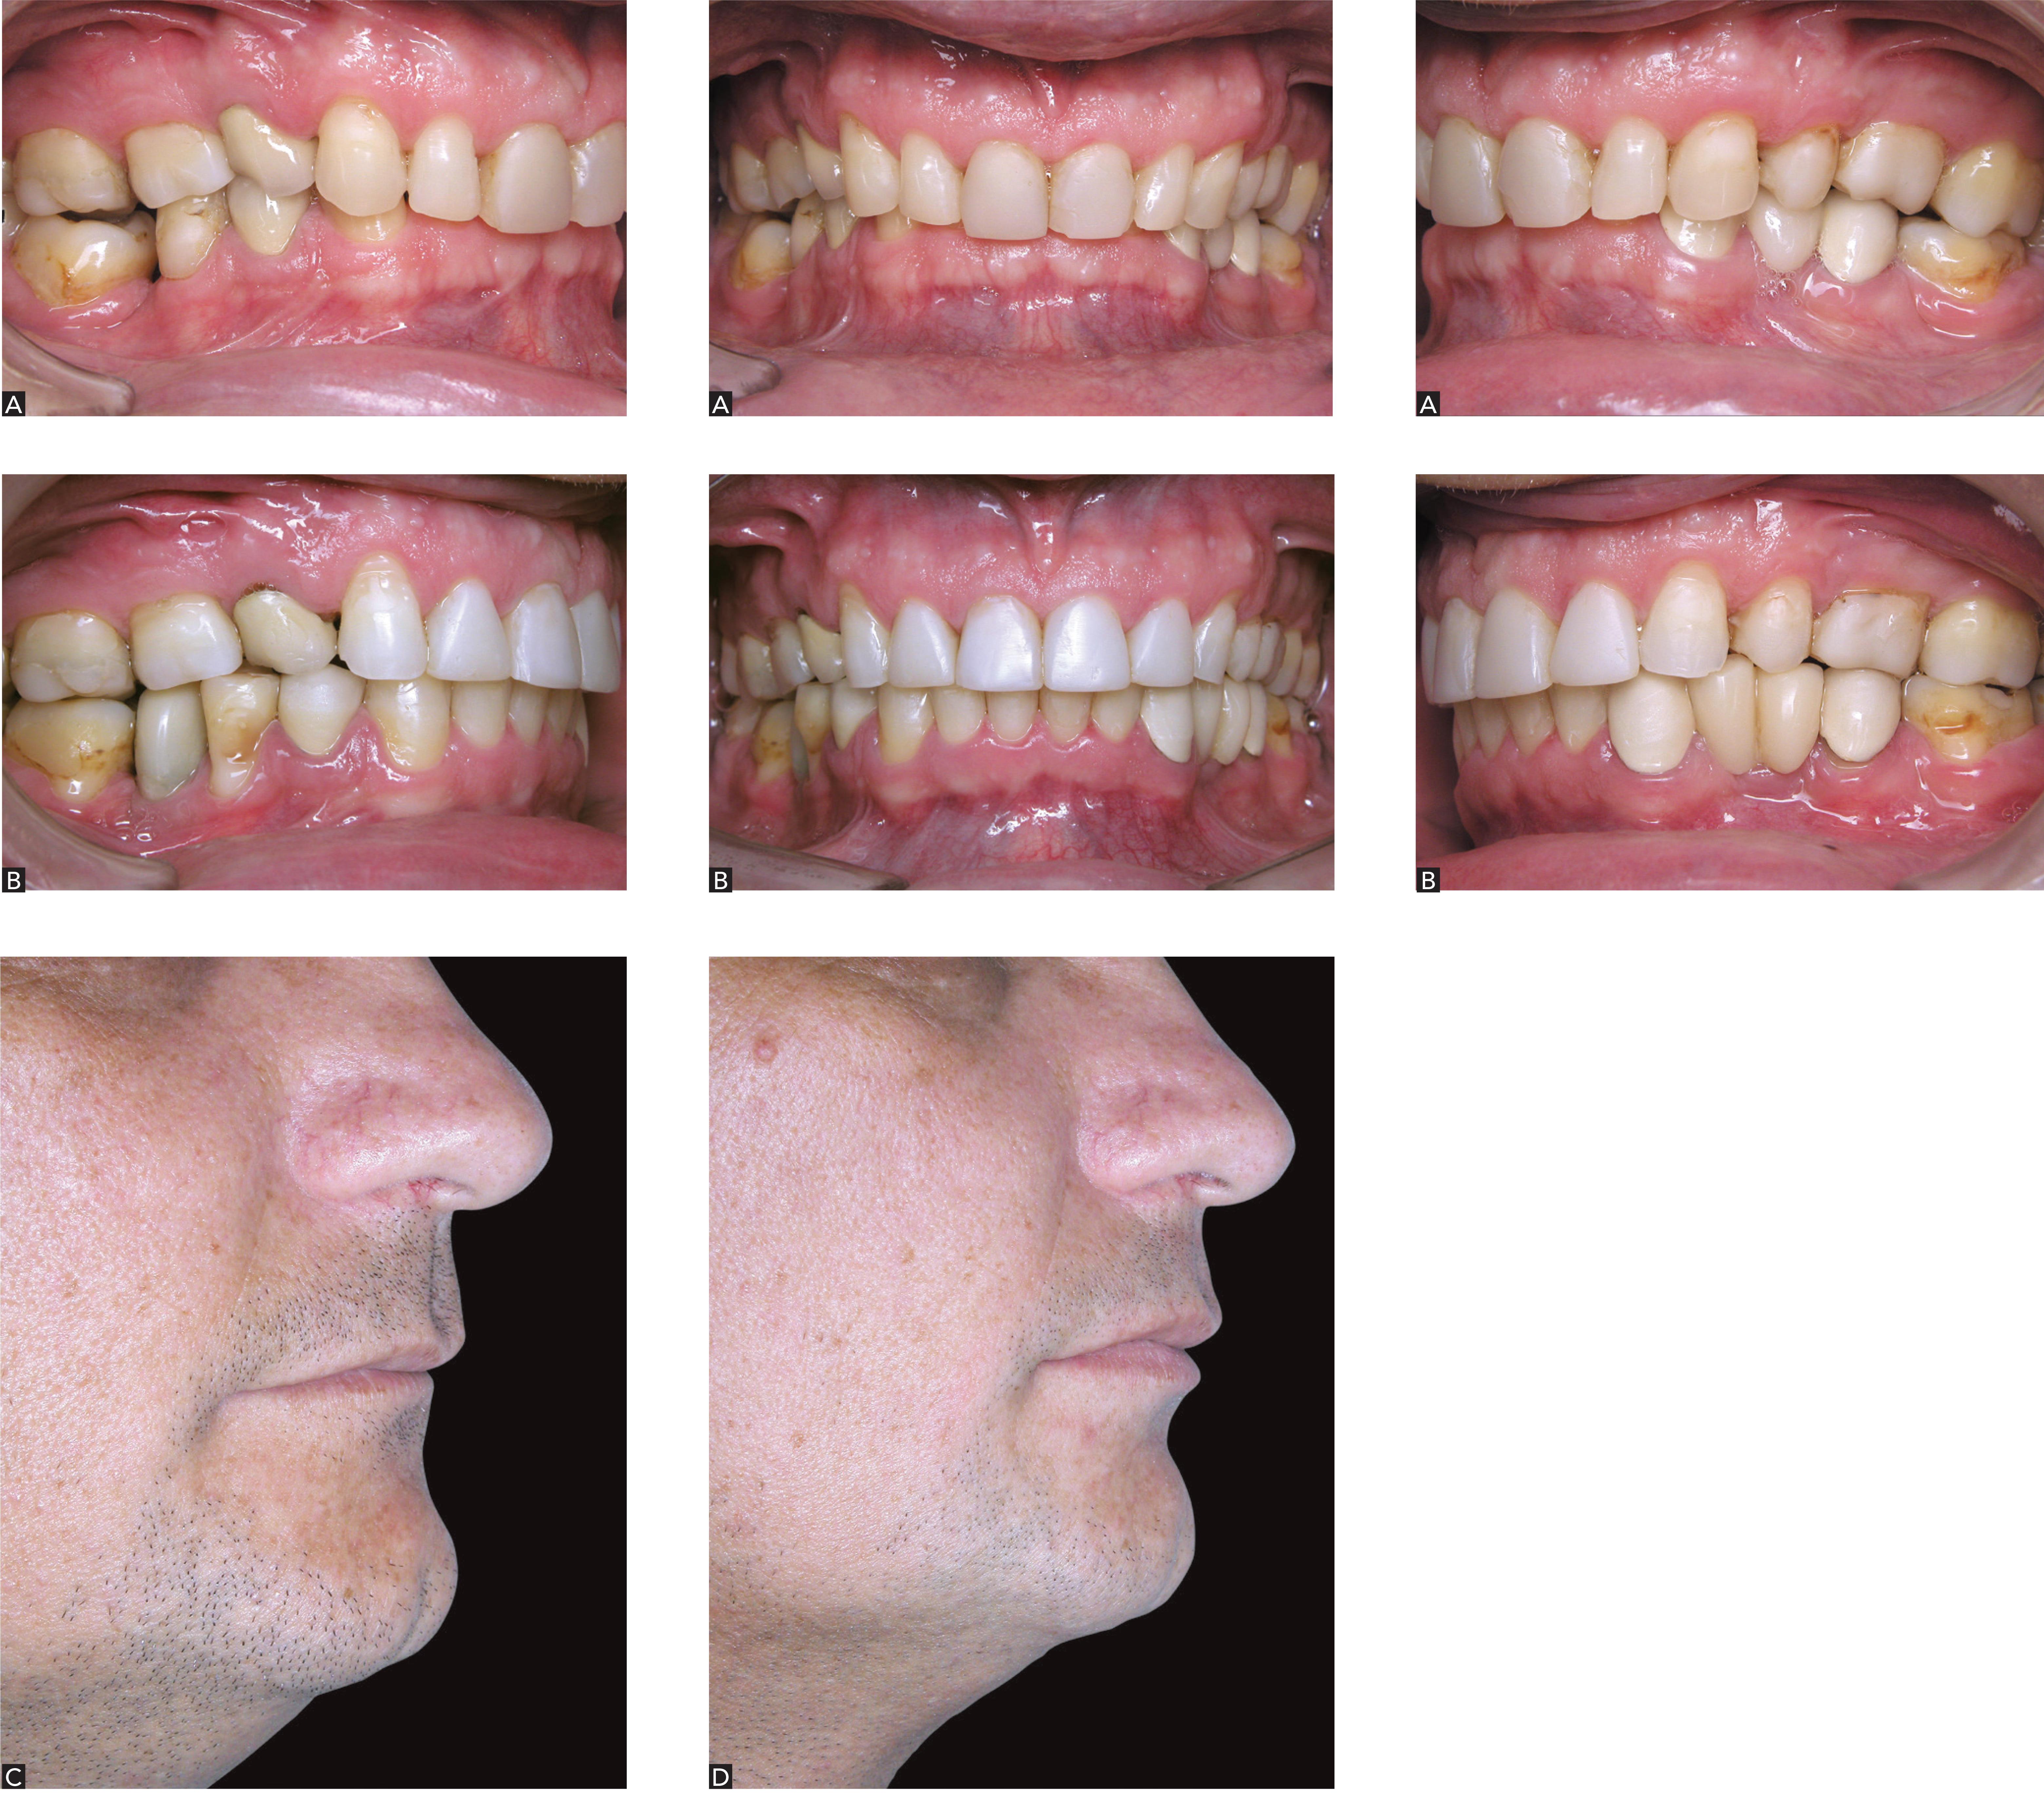
Figure 30
Case report illustrating increased lip volume after orthodontic
treatment: A) initial; B) final; C) initial profile showing thin lips; and
D) final profile showing increased lip volume.
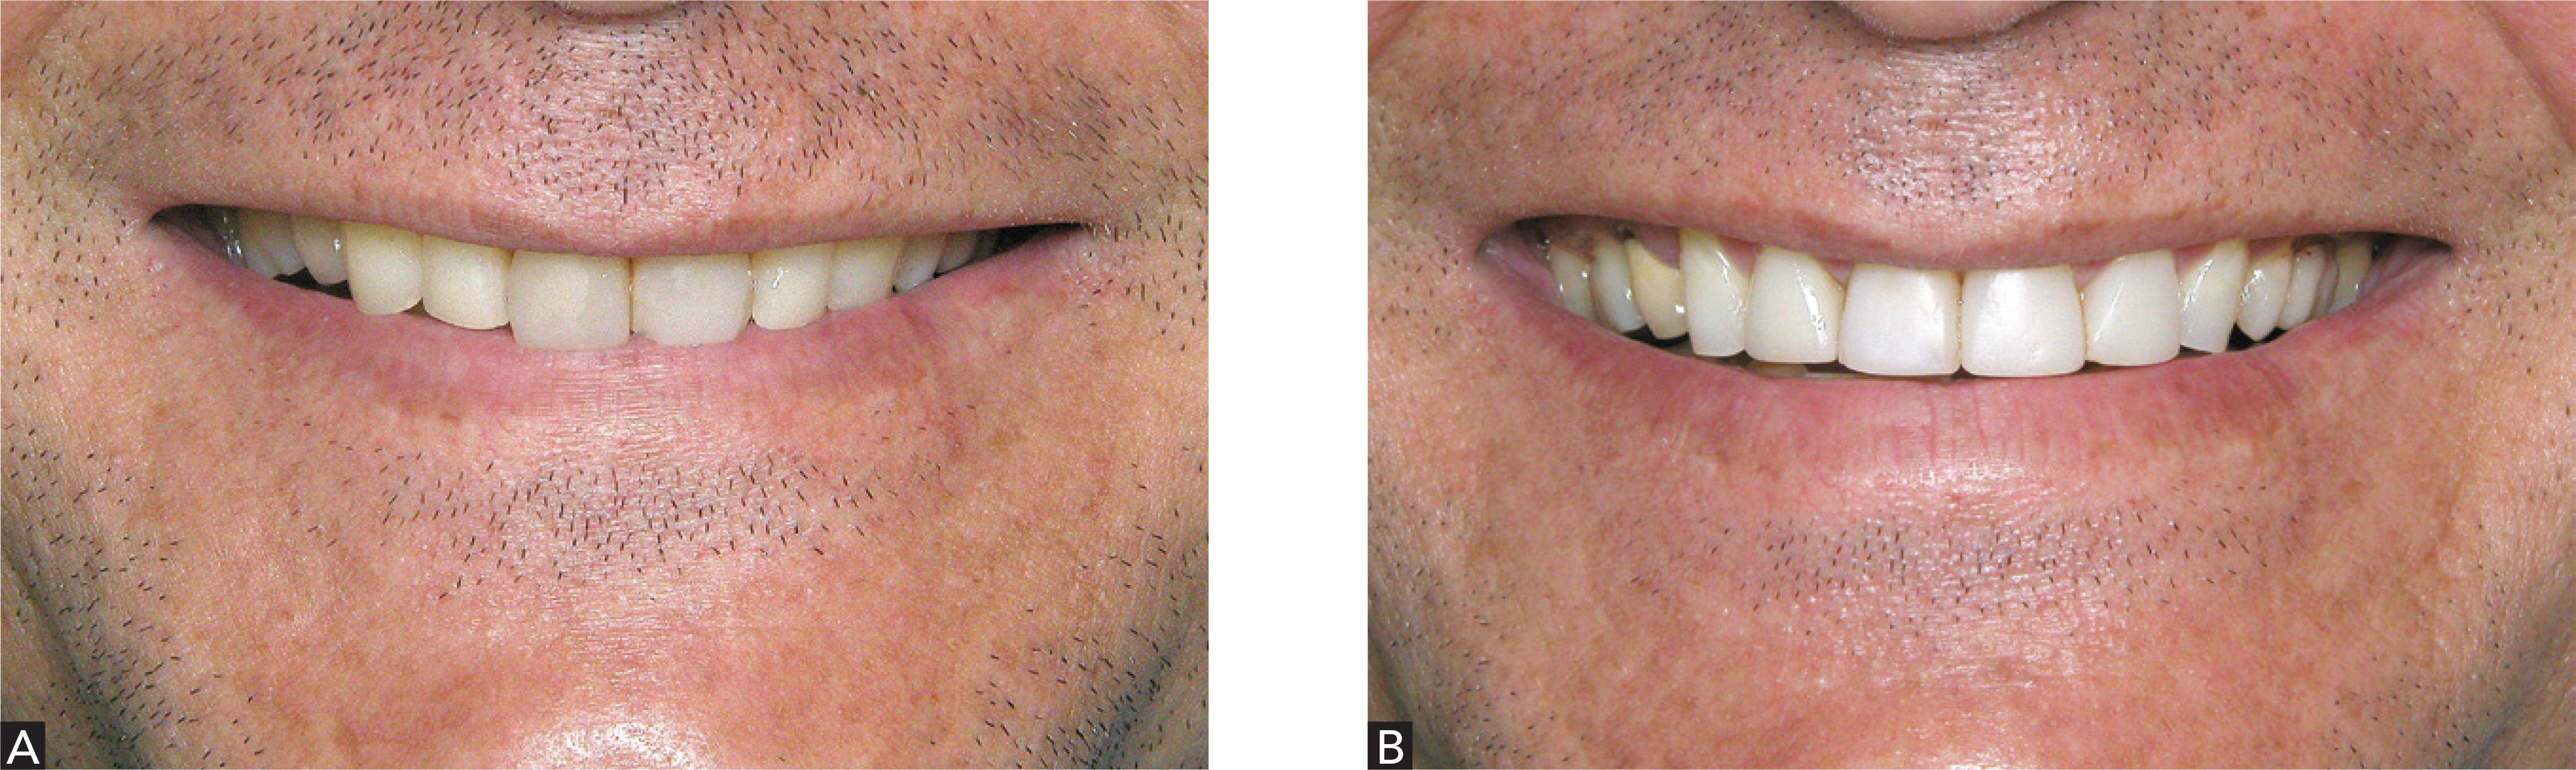
Figure 31
Clinical case shown in Figure 30: A) initial smile; and B) final
smile.
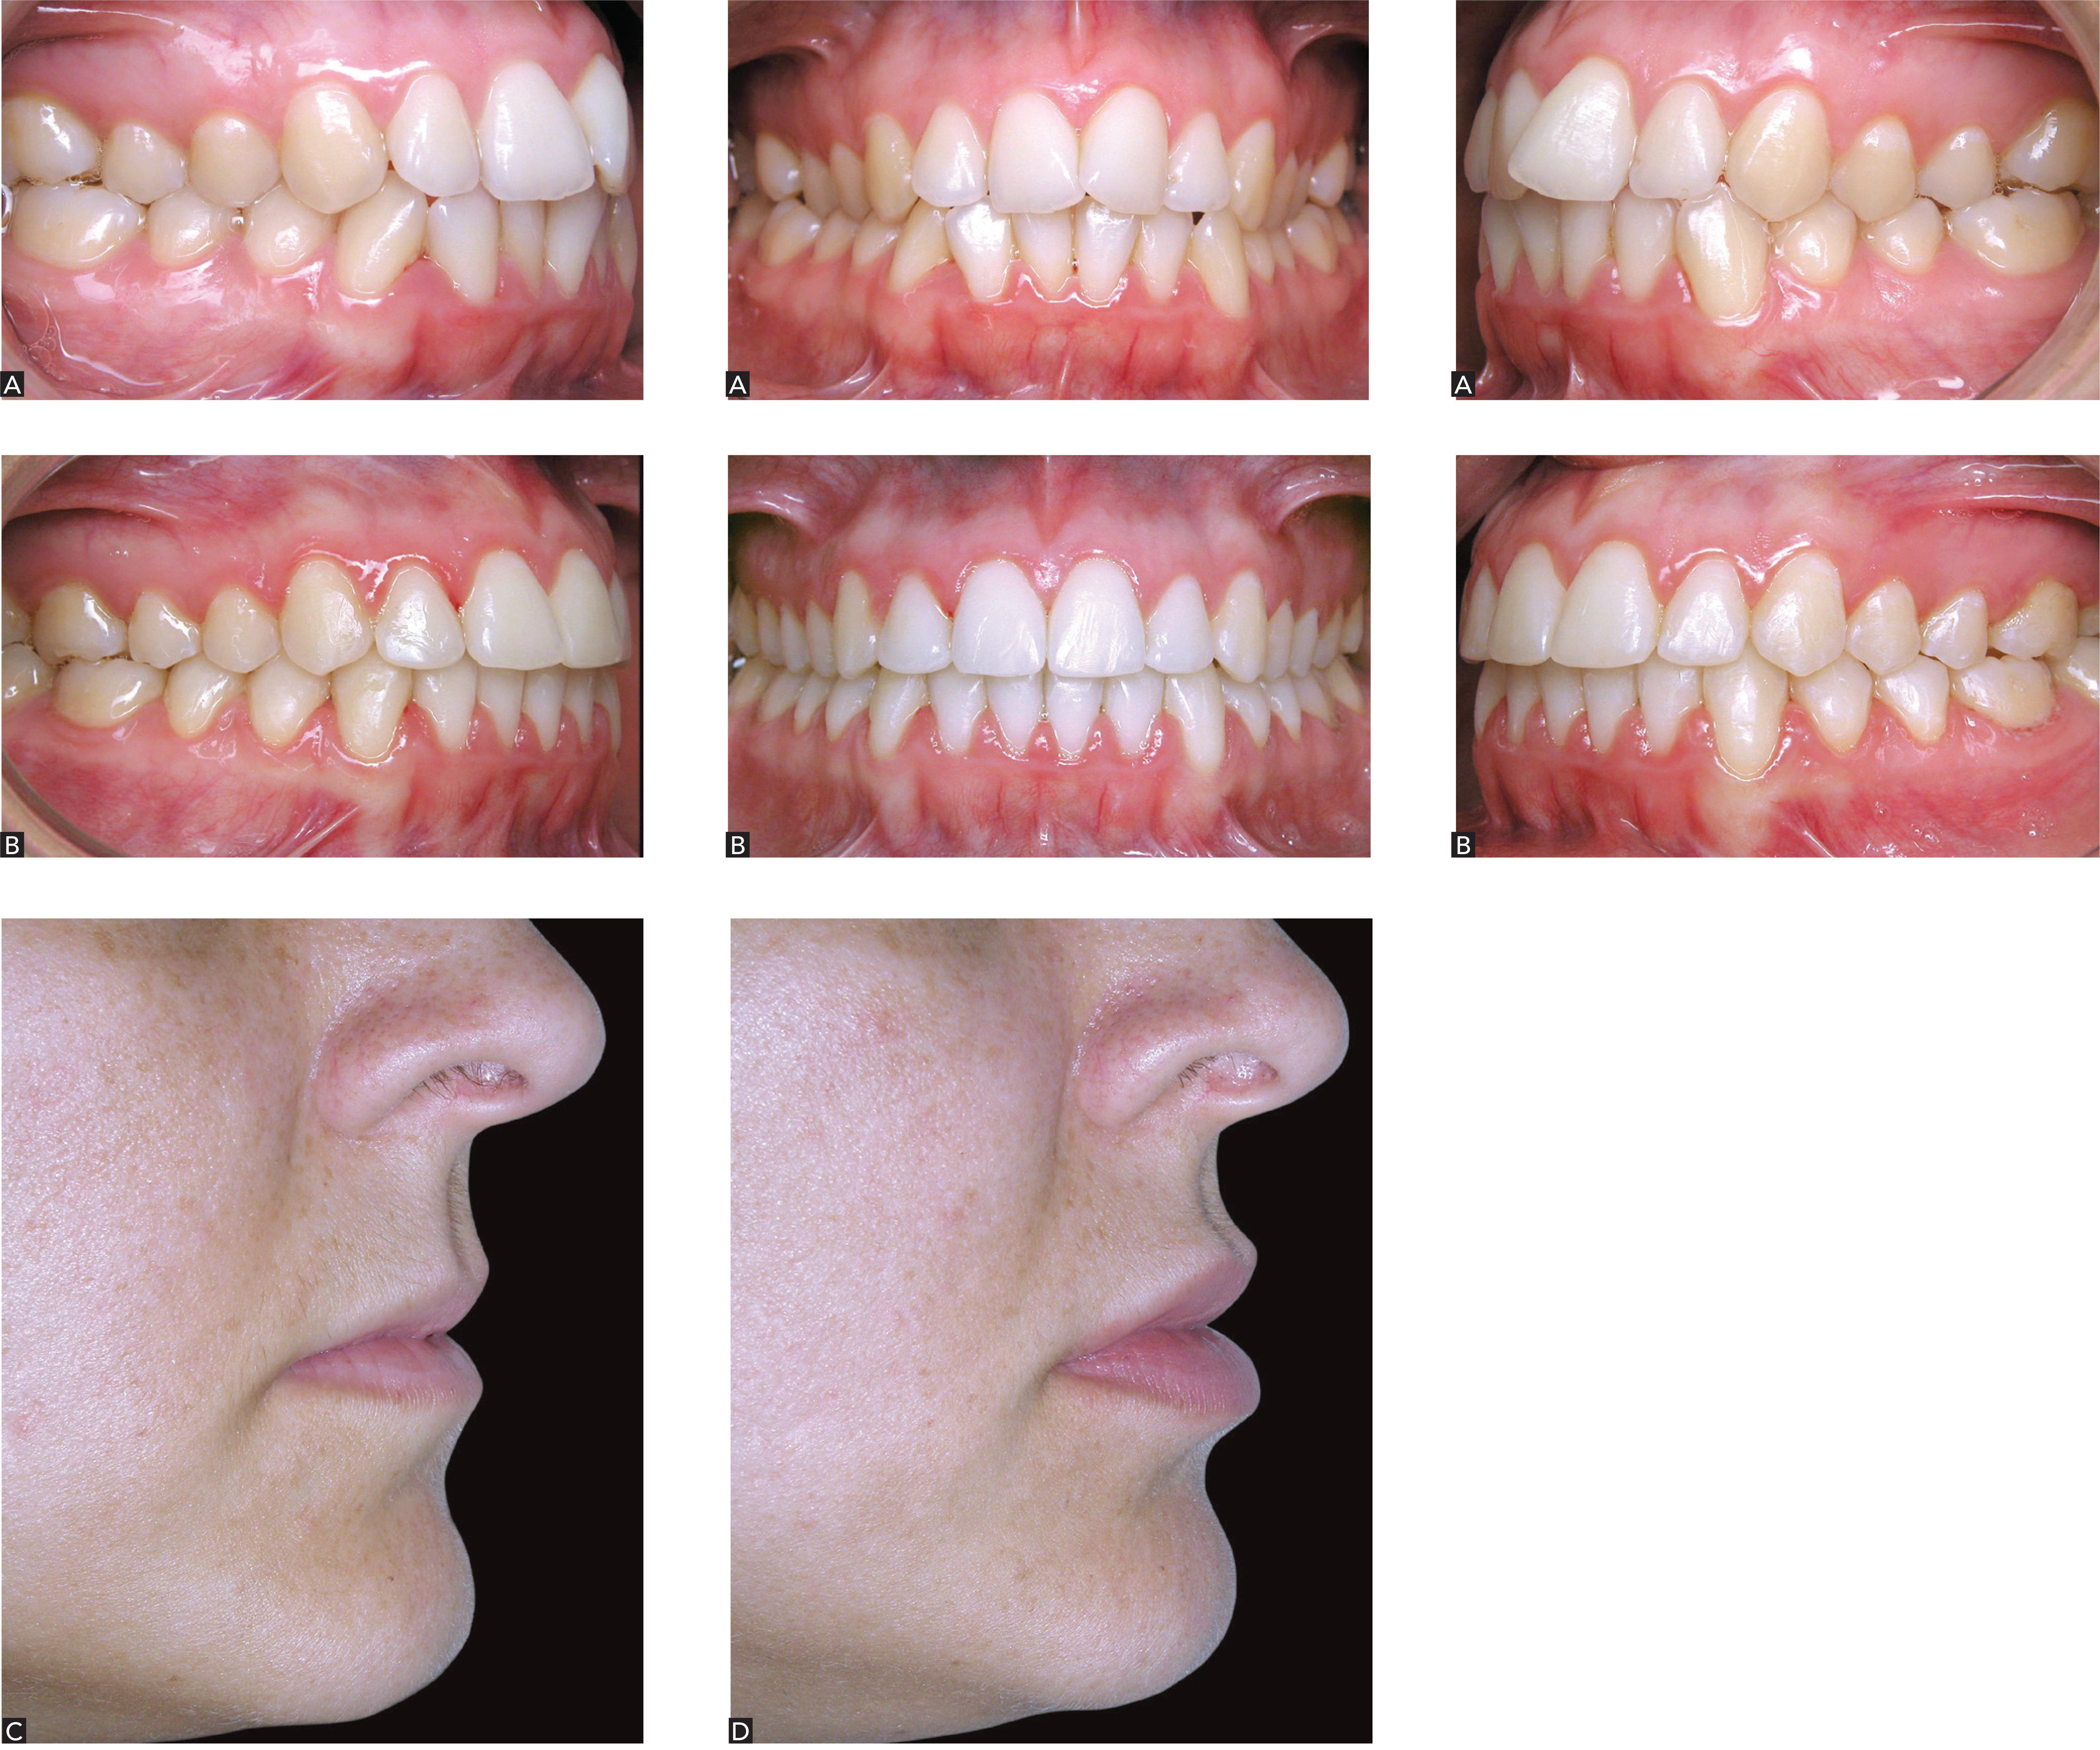
Figure 32
Clinical case illustrating multidisciplinary treatment associating
Orthodontics and Dermatology to correct smile and lip volume: A) initial; B)
final; C) initial profile showing thin lips; and D) final profile showing
increased lip volume after using filling agents for lip
augmentation.
Figure 33
Clinical case shown in Figure 32: A) initial smile; and B) final smile
showing esthetic A B benefits produced by multidisciplinary
treatment.